The Princess phase has officially set in... I'd say about 2 1/2 years old... well, surprisingly my daughter takes a major liking to one of the freakiest princess movies there is out, Snow White... (she was bobbity-boo ie: Cinderella for Halloween so we've moved a little past that (although, that may just be her all time fave). So, the frugal mommy I am, saw that the Snow White dress at the Disney Store (can I say that online??) anyways, while gorgeous, was WAY overpriced for our budget which ='s mommy sewing time :) see the post on the dress
http://colectinggrace.blogspot.com/2013/09/gracies-snow-white-dress.html
Ta-daaaahhhh
The minute Gracie put on her "Snow White" dress, she decided she wanted a Snow White birthday, yep she reminded me about 250 times before the party, just to make sure... (she'll make a great wife one day...)
For this party we happened to be moving, so I ended up doing an e-vite and combined the "Going away" with Gracie's b-day... double whammy whoop-whoop (not to mention we've only been there for less than a year, so it would be the same crowd)
First of all can I just say, when I start selling my stuff I'll be able to justify a photographer, for now you'll have to deal with my "I'm running late, last minute quick snapshots"... okay continue...
I think the banner was first... let's bust out my favorite toy THE CRICUT: (it is INCREDIBLE what you can do with paper, a cricut, glue and a little imagination....)

you can barely see but if you look closely under the "h" I made paper mine carts and used the 7 dwarfs symbols on the side... all i did was fold a peice of grey cardstock into a box, put black circles as the wheels and around and the circle lable one with a lantern, a pick ax and a jewel (=three carts). I filled those carts with cupcakes covered in frosting, then crushed graham crackers and jewel candy we made from a mold at Hobby Lobby. I bundled sticks in mason jars (tied with twine and paper apples hanging) with the apple symbol on the front in front of red/white polka dot ribbon wrapped around. I put her snow white little people toys all over that for decoration. the Snow White was hanging on the front door below. The evil queens table to the right says "Poison Apples" on the sign. I actually used a Harry Potter font I found online and printed the letters quite large. I cut them in penent shapes and put purple and silver cardstock as backing with the apple symbol between. above it are purple and black tulle puff balls hanging and purple tulle across. Its a carmel apple bar (hence the crock pot) there were about 10 bowls with different toppings (crushed M&Ms, crushed Oreos, coconut, chocolate chips, crushed graham crackers, you name it.) we unwrapped about 4 bags of caramels with a little water in the crock pot. It was a total hit! SO yummy! that table also had apple looking cupcakes and apple cakepops (as shown below)
 |
apple cake pops made the night before placed in rice in a cauldron
for the "Poison Apple" table |

Here are more decorations and tables...
 |
 kids table covered in brown postal wrapping paper, red burlap crossing, kids table covered in brown postal wrapping paper, red burlap crossing,
red yellow and blue (diff shades of blue doilies) cut with the cricut
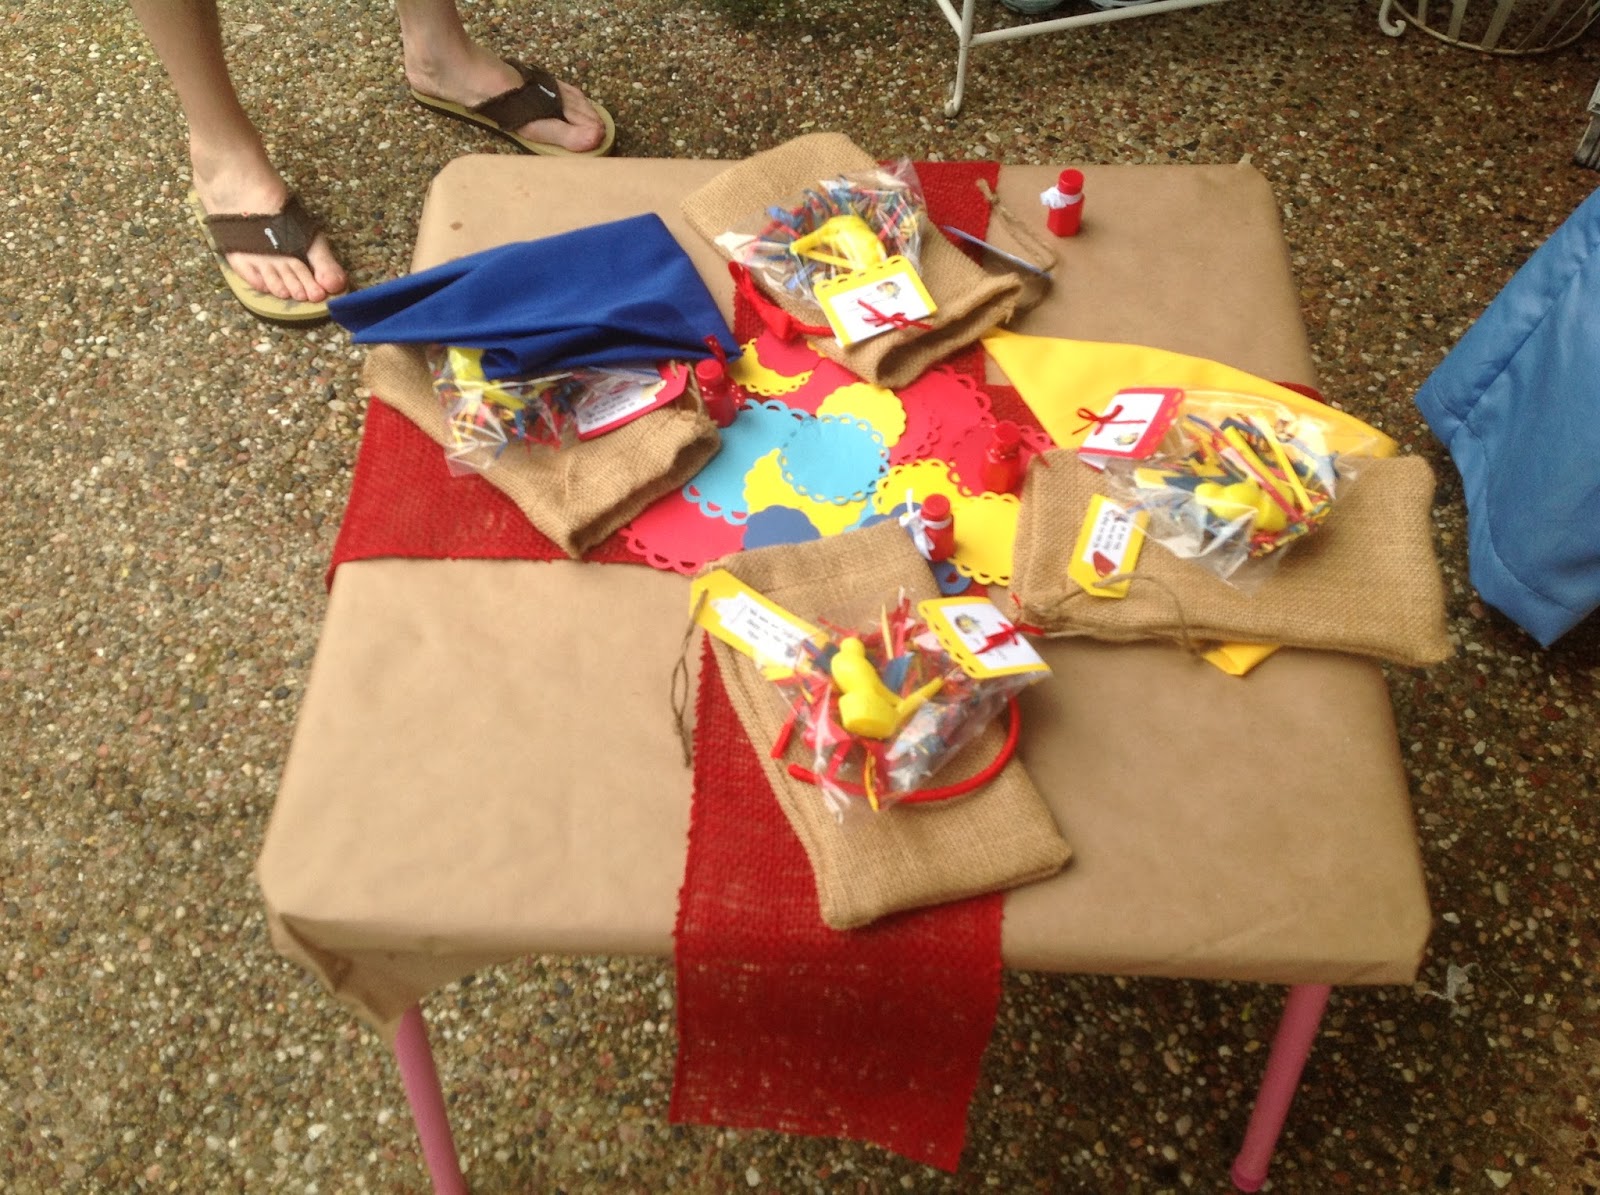
each guest recieved a whistle as shown below, a burlap bag for their
"heigh-ho" mining jewels, bubbles, a red headband or dwarf hat
|
 |
| you can see the paper apples hanging from the patio cover |
 |
| snacks (nutella and apple slices) |
Here are visual directions to the dwarf hats... (all the boys got dwarf hats and the girls got red ribbon headbands)
 |
| cut a yard in half |
 |
| fold a cut in half |
 |
| sew a curved diagnal line from folded tip to other tip |
 |
| should look like this |
 |
| cut along outside of curve |
 |
| turn inside out |
  |
the "heigh-ho" mine all the dwarfs in the grass with sticks in the tent as shown below were
rocks we made (as shown below) around plastic "jewels" from the craft store (hobby lobby or michaels)
|
   |
| here's the kids "panning" for jewels (I just punched holes in cheap aluminum pie tins) |
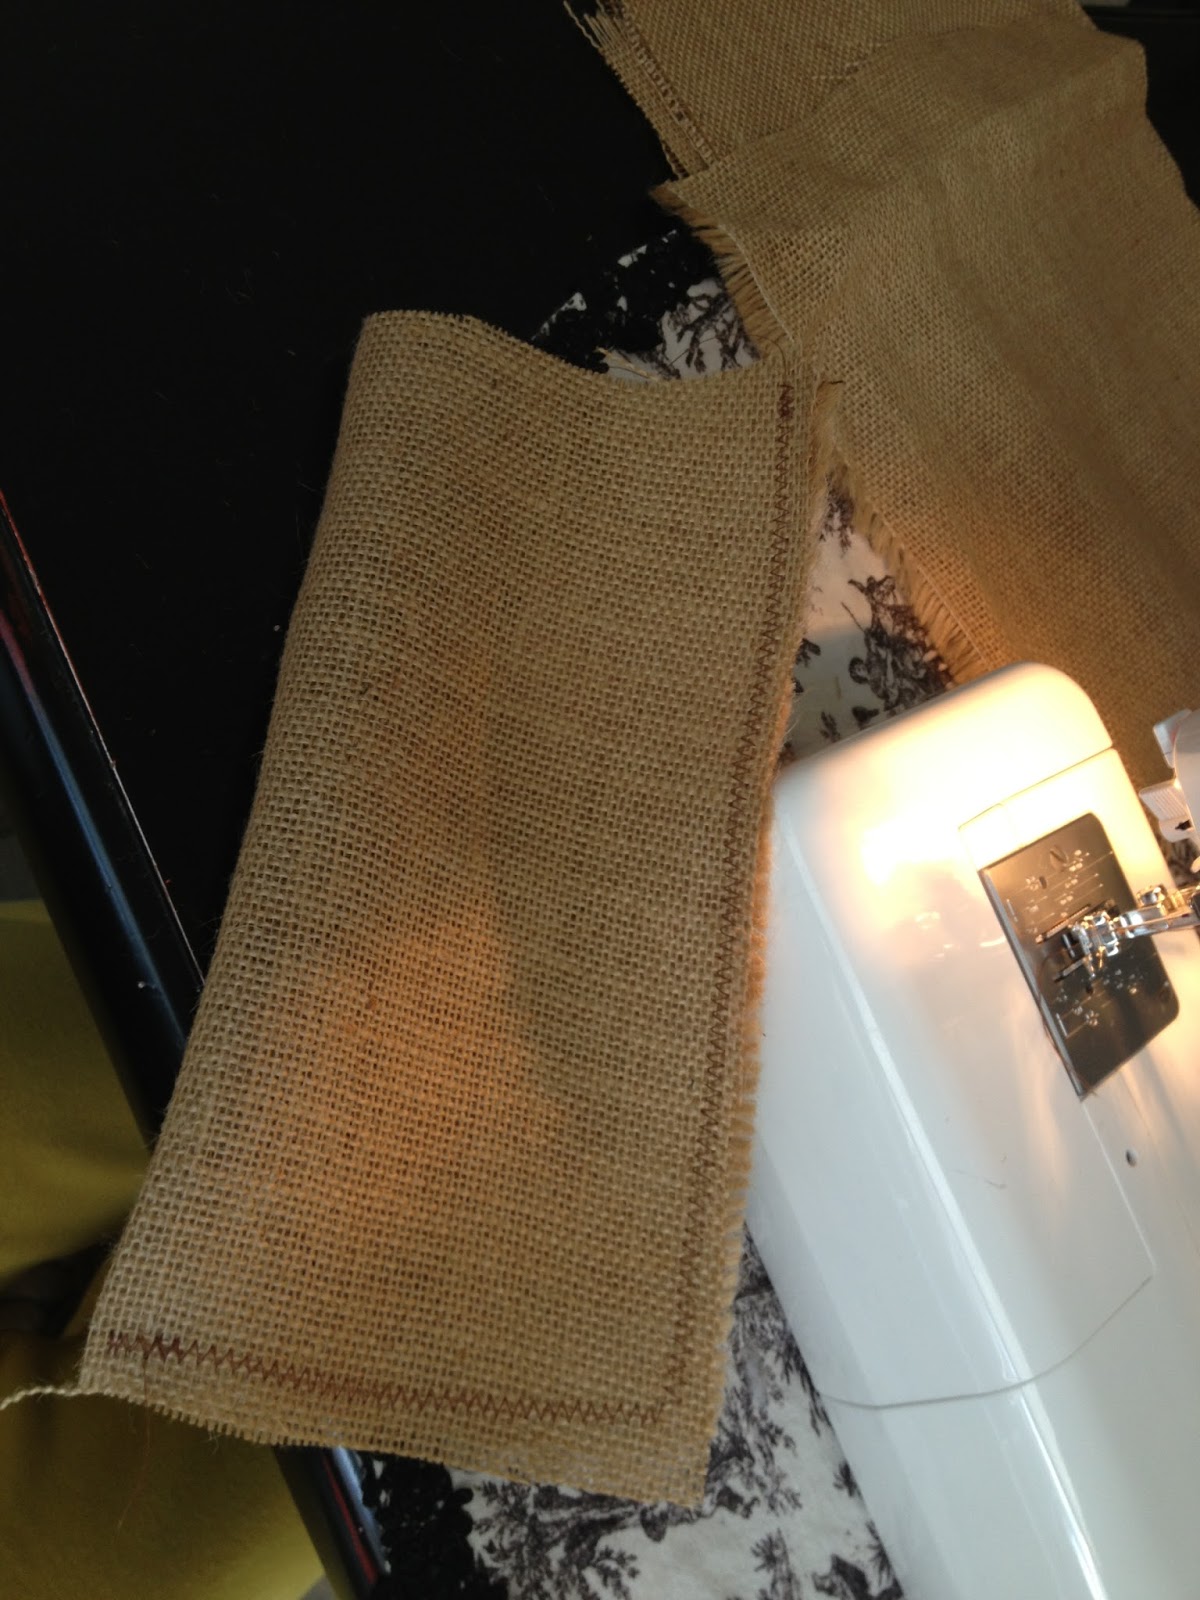
Here's a visual tutorial of the burlap bags the kids put their "heigh-ho" mine jewels in.
 |
cut burlap fabric in rectangles depending on size you want
(mine were about 12 x 8) |
 |
fold in half and sew along the edge and bottom
(leave open top) |
 |
| see |
 |
fold over top about 2" and sew along so you can string through
to make a drawstring |
 |
| like so |
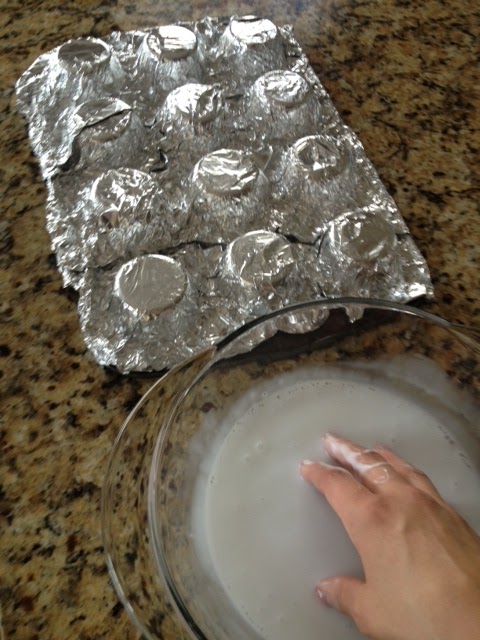
I found a nest tutorial on pinterest and these cute warbling bird whistles really cheap (ha ha get it) online. (they're the kind you dip in water to make bird sounds)
1) cover a muffin tin in foil, upside down
2) fill a bowl with equal parts, glue and water
3) take strips of paper (I used leftover from the banner) and soak them in solution
4) cover tops of muffins with strips
5) let dry (took about 3 days!!!) and carefully peel off nests
Here's the kids making the "mining rocks" recipe here:
http://www.sewcando.com/2010/04/diy-treasure-stones-tutorial.html
(MAKE this and nests a week to a few days ahead as they take a while to dry)
Okay, I'm getting tired... here's random pics and captions throughout the party...
 |
Gracie blowing candles to her "gooseberry pie" I just baked a cake in a pie dish, smothered strawberry jelly
criss-crossed light brown frosting and voila |
Here's a game we played... "pin the tissue on Sneezy's nose" I actually used stickers attached to a tissue. the kids that weren't too freaked out to have a blindfold enjoyed it!
~Happy Birthday Princess!~
PS: A special thanks to my WONDERFUL and patient Hubby and my friend Nicole (there is NO WAY I could have pulled this off without you!!!! (without tears...)
if you're intersted in further details or purchasing any of my banners, etc... feel free to email me at
colectingGrace@yahoo.com


 Next I did the same with the fabric piece and glued all the sides as tight as I could...


