Obsessed is an understatement with how my son feels about Pokemon right now... thus makes the perfect theme for his 9th Birthday!
First off the invites. I googled anime and watched a few youtube tutorials. I did my best at creating cole the old fashioned way with paper and pencil. I then scanned the pic I drew, then uploaded to photoshop and added the color. I wanted it to look like a trainer card to the best of my ability. turned out okay. I found a website that you can create your own pokemon card:
http://www.mypokecard.com/en/ All you do is upload the pics (evolve option in left corner) and fill in the rest. super easy! for the back i just printed out what the back of a pokemon card looks like in the same size as this and glued it (you can scan an actual card or just search online).
(I also used that website, as noted below, to create blank pokemon cards for each "type" so the kids could create their own pokemon cards.)
You'll notice there's no address on this invitation card. If you've ever played pokemon or been dragged into watching your kid play, you'll notice they have maps that they walk around before they get into "battles". I wanted to be creative and use the "map" idea and actually found websites that have all the little figures (like houses, trees, and gym's) but it was way too time consuming so i did my best with what I could do without spending too much more time. for the map I found a picture (not photo) of a Nintendo DS and photoshopped in our address and map to our place so it looks like the DS has the map... I just used mapquest to get a map of our neighborhood and did a close up on the top. (Main streets panned out map on the bottom and closer one on the top) i did use one of the pokemon houses for ours. i found a cute font that looked like the font on the actual game and put Rener City Gym: our address.....

for the outside labels we put each kids name reading "Pokemon Trainer Johnny" and so forth. i downloaded a pokemon font.

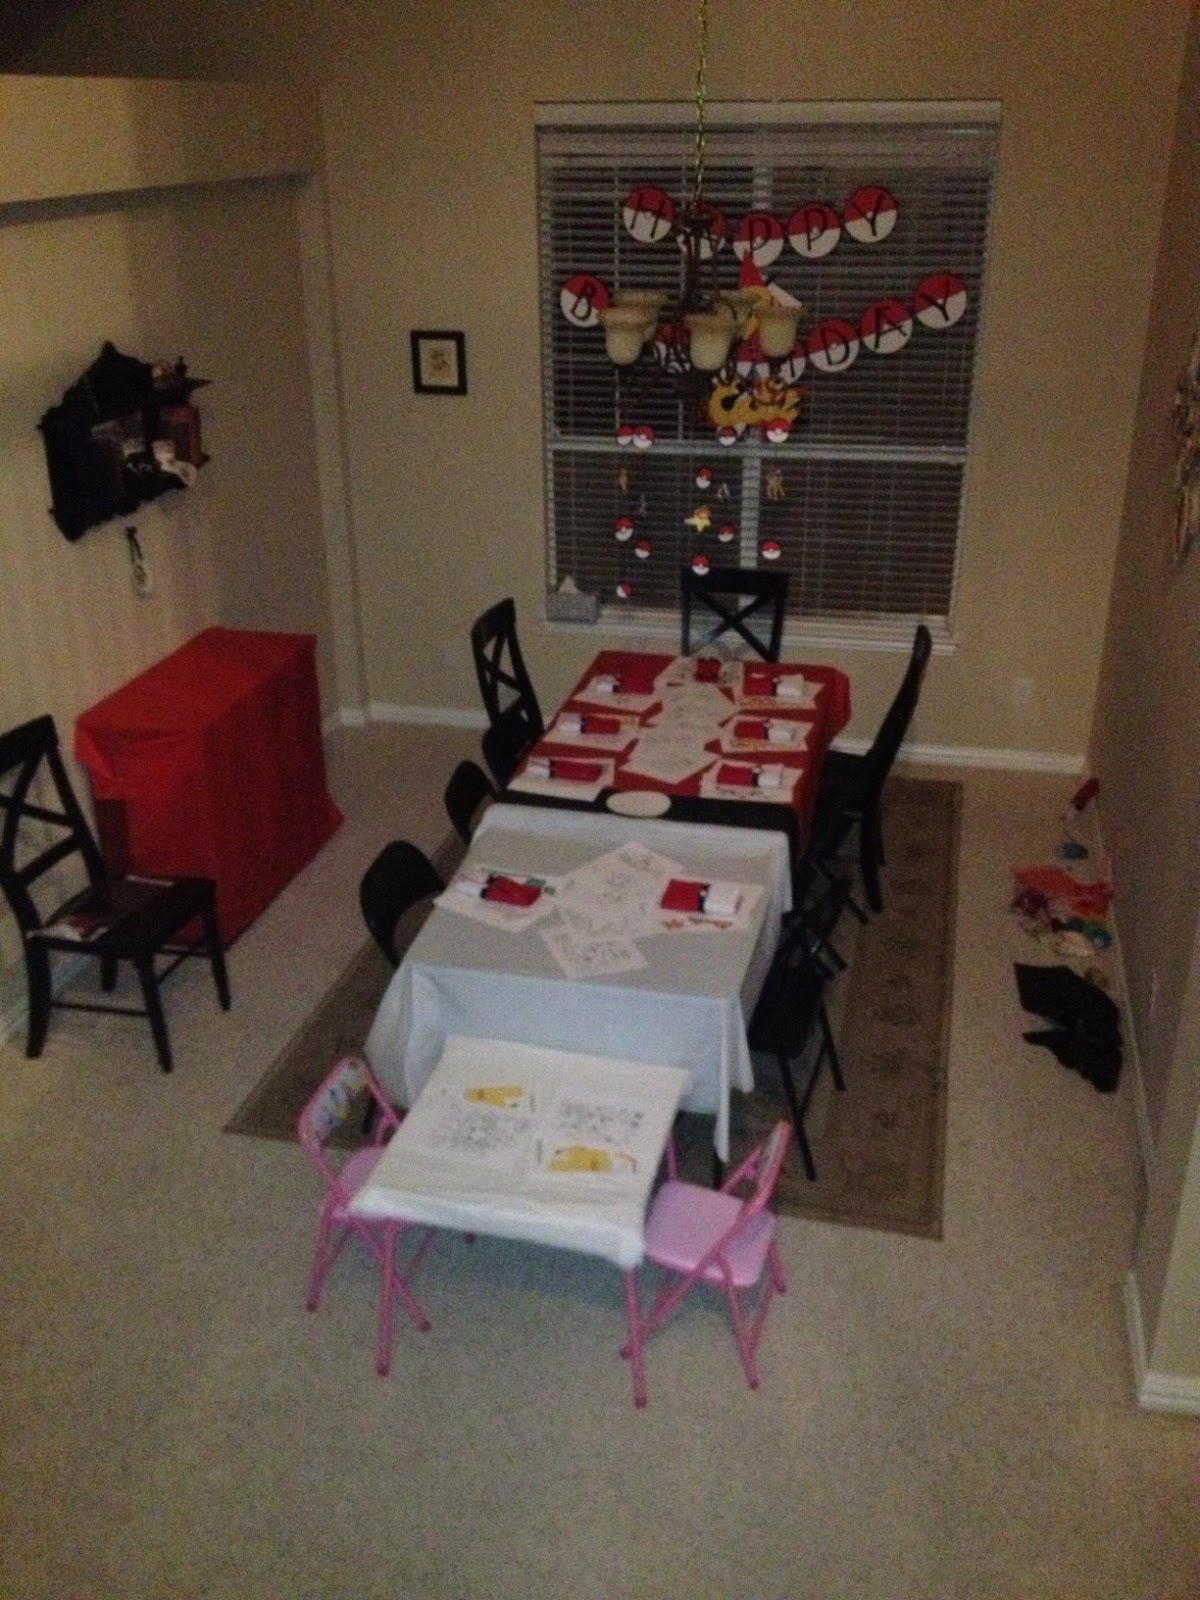
Decorations: of course we stuck with the red black and white pokeballs
as the theme color scheme.
I used my wonderful cricut just circles to
create the pokeballs banner. I found a pokemon font online and downloaded then printed 9th and Cole in that font on Yellow paper then cut it out as shown. I found some of my sons fav pokemon to create the
mobile hanging from the chandelier. I copied and pasted on word (two of the same
images for each) and flipped the second one to create a "mirror image" so I
could cut and glue them back to back with the string through the middle. I
created several pokeballs in different sizes (making sure I had two of each, to
glue those back to back as we'll with the string in the middle. Since we knew we
only had about ten kids I set the kids up in their own room (formal dining room)
so I used our normal table placed a square table on the end to elongate it and
put my daughters princess table on the end so the little ones could be a part of
he party. I covered the tables in red white and black plastic table cloths and
placed a large black ad white circle in the middle to look like a large
pokeball.
Food: what's better for nine year olds than pizza. I made
fondant in red black and white to make the round cake look like a pokeball. It's
a lot easier than you think. Just use a LOT more powdered sugar and food
coloring than recipe calls for. Here's the recipe:
I also attempted to do
pokeball cake pops. I think big I had more time it would have worked out but I
tried to rush it and used too much frosting. I also made cupcakes and used the
rest of te infant to make them look like pokeballs. I also used the pics i had for the mobile and printed several pokemon laterally on a few sheets of cardstock and glued that as a strip on my cake plate. Overall it was really cute!
Activities: bingo cards are one of my favs you can be super creative
with them too. Cole can recognize pretty much all the pokemon so input the pics
on each square I downloaded a pokemon font that each letter is a different
character se are duplicated so be careful:
I went through Coles pokemon
book and randomly called off pokemon for the kids to place markers. I printed out
pokemon coloring pages i found online to put on the tables for the kids to color
with cups of colors on the table. I found a website that does block paper
figurines of pretty much everything you could think of and of course they had
Ash and pikachu and several other pokemon I printed those out one for each kid
and put them down on the table with kid scissors and glue sticks the website is
www.cubeecraft.com for some reason my computer is super slow right now, I tried to find it with my iphone i think the link is
www.cubeecraft.com/cubee/pokeball they have a ton of pokemon so you can just do google or yahoo images and put in cubeecraft pokemon to find them that way. (I'm seriously going to use this website for EVERY party or rainy day! super fun!!)
Take
home/favor: You'll hear me say this a LOT. I really DON'T like the cheapy party store take-homes that break within 20 mins of your kid playing with them so I've always tried to make the favor/take-home something the kids will actually use and appreciate... I had a ton of red black and white felt (brownie points for using
stuff I already have). I made color pencil rolls for each kid with a larger
side that will fit pokemon cards. I used the same website for the invite to
create black pokemon cards that the kids could create their own and printed them
on card stock. And placed them in that pouch along with several actual pokemon
cards (I bought a ton on eBay). I also had a bunch of little rectangle notebooks that were coincidentally the same size as the pokemon cards leftover from my son's Phineas and Ferb birthday party a couple years ago (I'll get that one up too soon). so i printed out sticker labels with a thank you note to put on the cover of the notebooks and slid those in as well. I have to say this is perfect for going out to a restaraunt or somewhere your child could use some entertainment without busting out electronics... good ol' fashioned art! Cole loves his color-pencil roll and has created so many of his own Pokemon cards.
Pic's of course:


 Ingredients:

 Decorations: of course we stuck with the red black and white pokeballs
as the theme color scheme.
Decorations: of course we stuck with the red black and white pokeballs
as the theme color scheme. 


